Invite users to your workspace
Invite colleagues to your workspace so you can collaborate in SNDQ. Access is controlled by permissions: you can give each person the right level of access without sharing credentials. Typically, this includes accountants and building managers.
TIP
Only users with User has admin rights can invite new users.
Open user management
- Open
Settings - Go to
Users
The user list shows:
| Column | Description |
|---|---|
| Name | Full name of the user |
| Login email address | |
| Admin rights | Whether the user has admin rights |
| Date | Date added and by whom |
| Status | Active or Invited (pending acceptance) |
Invite a user
- Click
Add user - Fill in:
- First name; Last name
Email
- (Optional) Enable
User has admin rightsonly if this person should manage workspace users and settings. Ideally, keep only 1–2 admins per workspace. - Click
Add userto send the invite
| Permission | Description |
|---|---|
| Admin rights enabled | Full access to all settings, user management, integrations, and templates |
| No admin rights | Standard user — access to day-to-day operations (buildings, invoices, contacts) but cannot manage workspace settings or other users |
Video — Invite a user
What happens after the invitation?
| Step | Description |
|---|---|
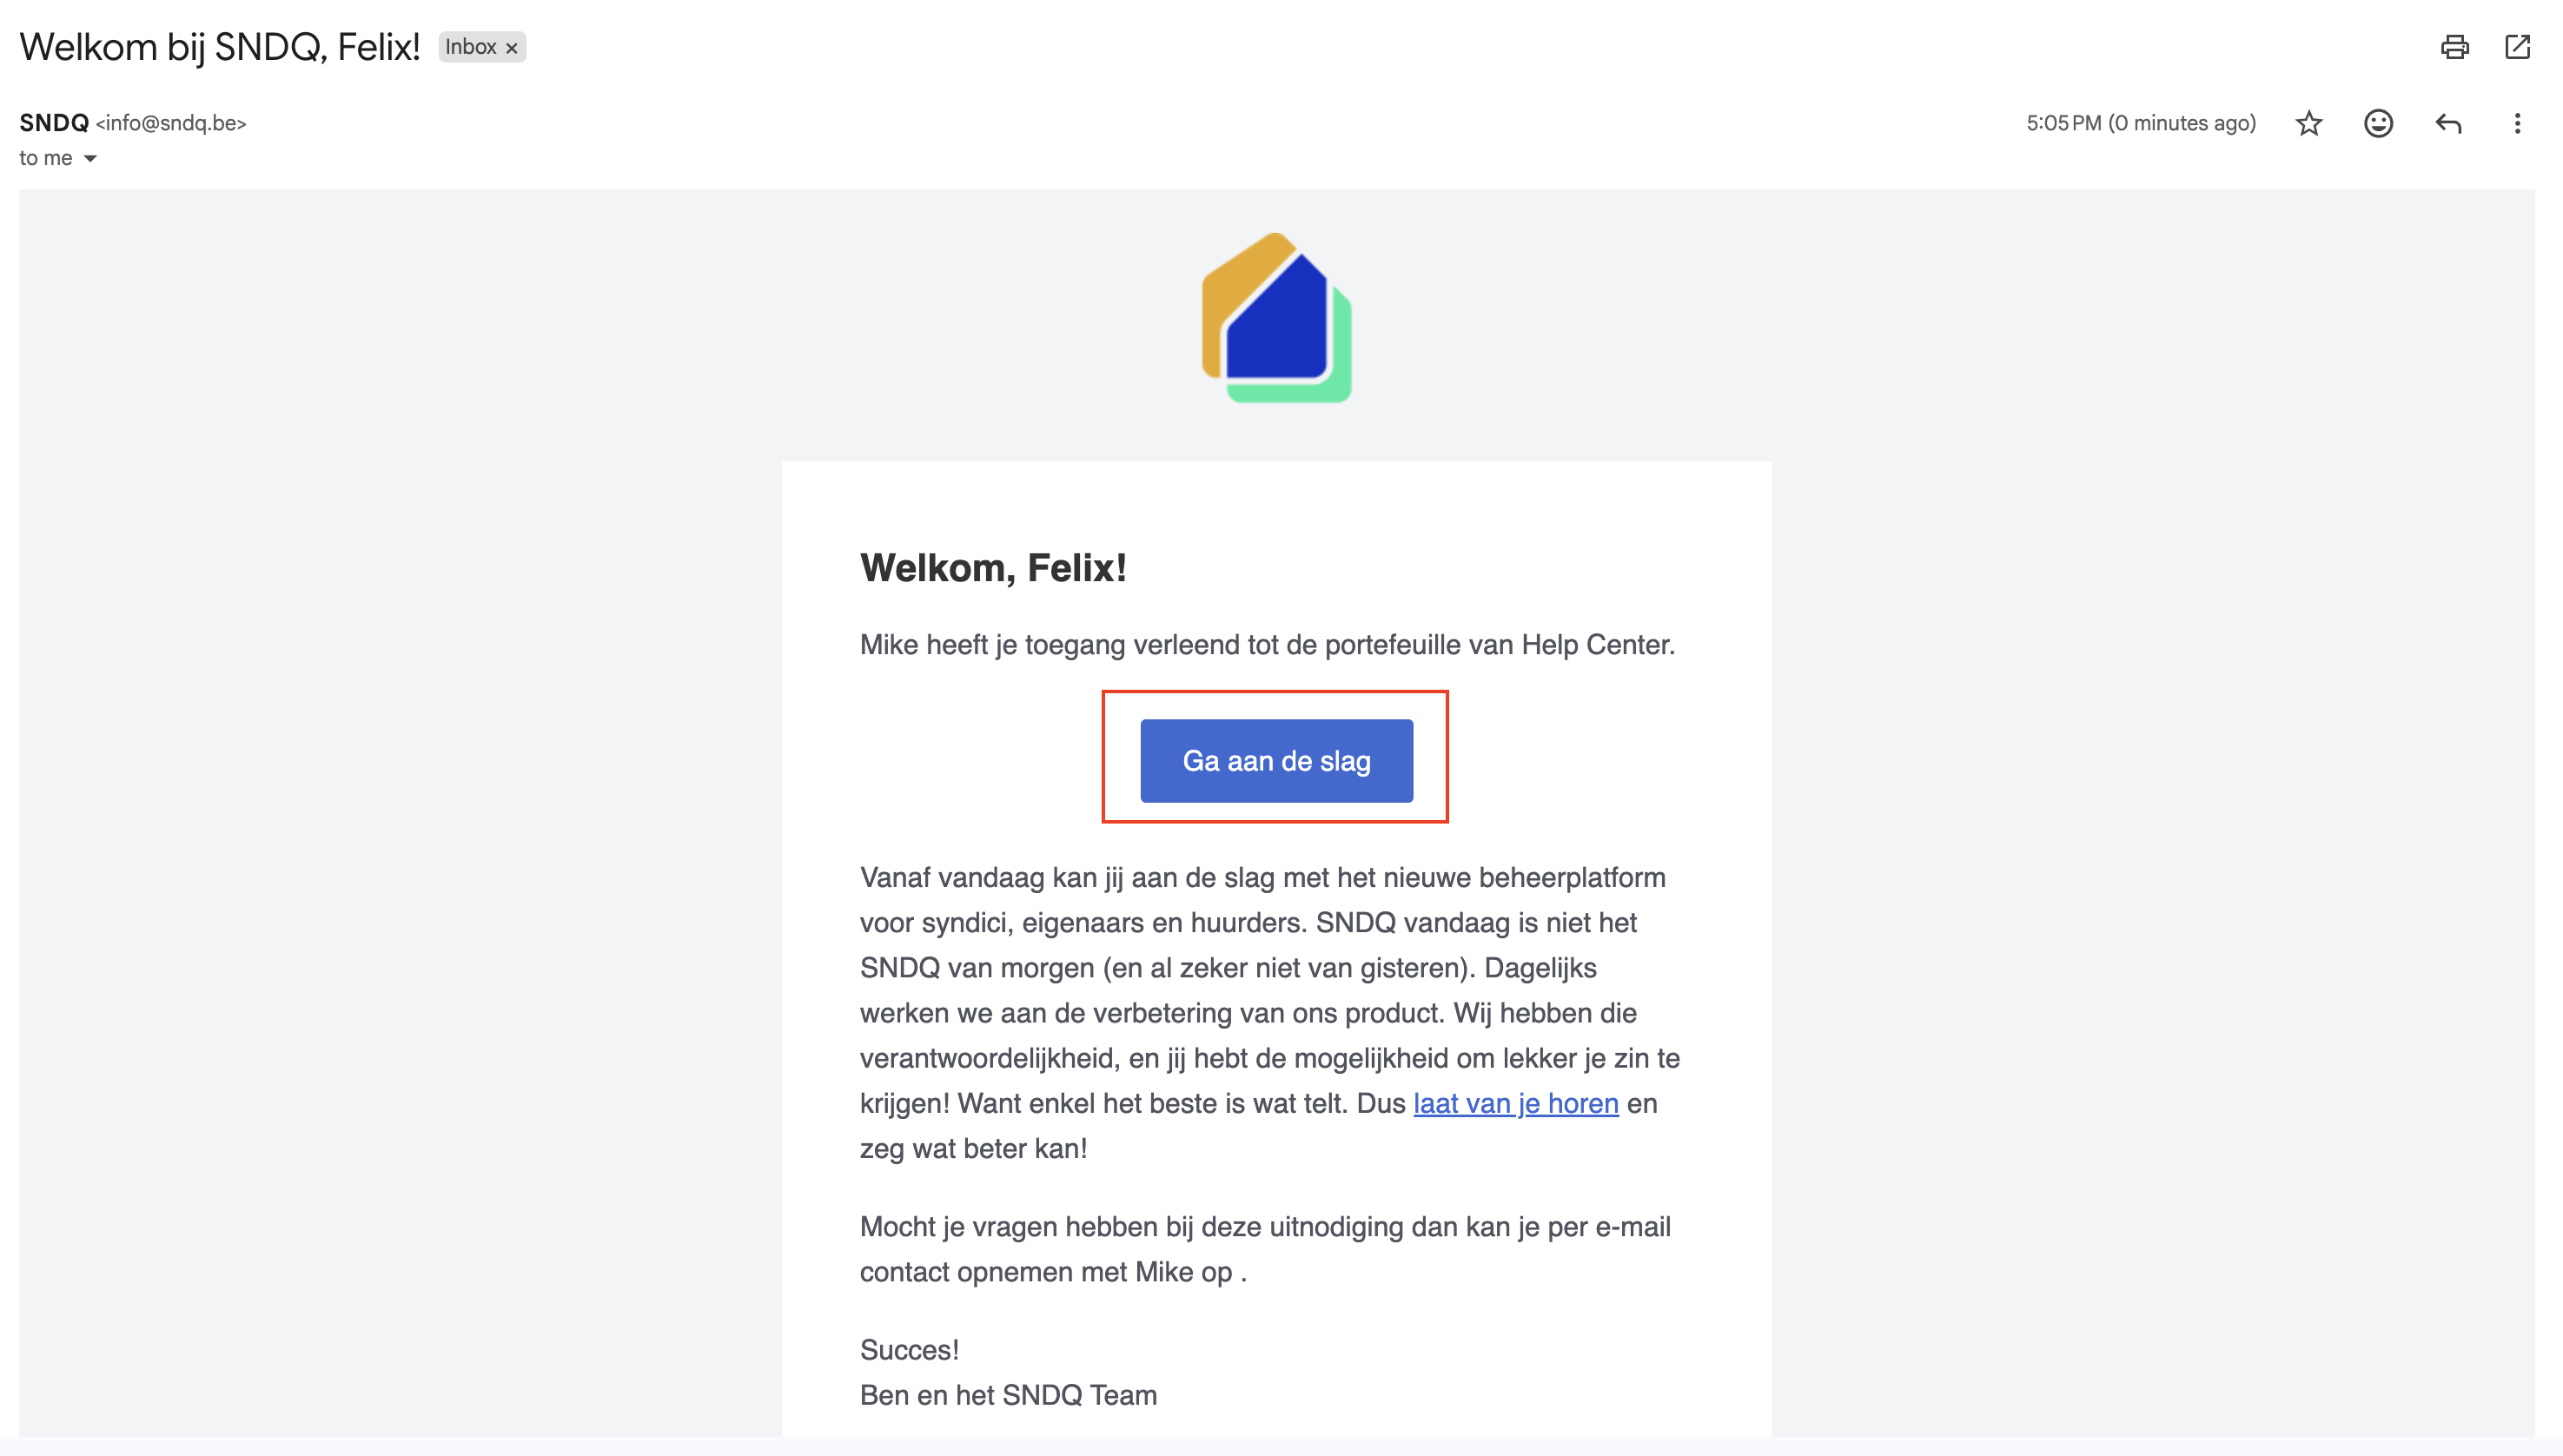
| Invitation sent | The user receives an email with a link to join the workspace |
| Status: Invited | The user appears in the list with status "Invited" until they accept |
| User accepts | The user clicks the link, creates their account (or logs in), and joins the workspace |
| Status: Active | The user is now active and can work in the workspace |
WARNING
The invite link is valid for 24 hours. If the email doesn't appear, ask the user to check their spam folder. Make sure they click Get started within that time to complete access.
Manage existing users
| Action | How |
|---|---|
| Grant admin rights | Toggle admin rights on for the user |
| Revoke admin rights | Toggle admin rights off for the user |
| Remove a user | Click the delete icon next to the user |
Good to know
- Admin rights allow a user to manage workspace settings, invite/remove other users, configure integrations, and manage templates. Grant only to trusted team members.
- At least one admin must exist in the workspace at all times.
- Removing a user revokes their access immediately. Their past actions (created invoices, contacts, etc.) remain in the system.
- Email address must be unique — each user needs their own email to log in.
- Invited users who have not yet accepted can be removed and re-invited if needed.